In today’s world of passwordless and two-factor authentication, SMS and email verification have become critical parts of the user onboarding process.
If you run a mailing list, real-time email validation and verification are important to ensure that the provided email the user gave you is correct and valid. Having undeliverable addresses on your list is not only a waste of money (you are paying your email campaign platform for those spots), but it can also lead to increased bounce rates, which harms your sender reputation and can mean that your message to a new user may end up in spam.
One of the most popular frameworks for web and app development is Node.js. Node allows you to run JavaScript on the server, and its async event loop architecture makes it an excellent choice for apps that need to consistently run non-blocking I/O operations (such as updating a database.)
If you have a Node.js application, setting up email verification for auth and other applications is very easy. In this article, we’ll run down the steps of implementing email verification in a Node app, look at some security concerns, and troubleshoot some common issues.

Setting Up a Node.js App for Email Verification
This tutorial assumes some familiarity with the Node ecosystem. We won’t be diving into how to get started with Node. If you need help with that, we recommend reading the docs or following this tutorial.
We’ll use Express to configure our server, jsonwebtoken to generate and read JWTs (JSON Web Tokens), and nodemailer to send emails.
JWTs
A JWT or JSON Web Token is a credential with an encrypted payload that can be attached to a network request. It holds some data about the sender of the request and the receiver of the request. It can be used to verify that the sender and receiver are who they claim to be.
For more information on JWTs, check out this site.
Installing Prerequisites and Configuring Files
Install all the needed packages using npm.
$ npm install --save express nodemailer jsonwebtokenDouble-check your package.json file to make sure everything is installed correctly.
Create a file called app.js to handle routing for the main application and a handler file for creating the email request called authenticationHandler.js
$ touch app.js authenticationHandler.jsPreparing Other Email Services
You will need to have an email address registered with some email service to send the outgoing messages from. In this example, we are using a Gmail account. We store the credentials for that account in a secrets config file called env.
Implementing Email Verification with Node.js
Let’s look at the three steps of sending a verification email: generating JWT tokens, sending the email, and handling the response.
Generating Verification Tokens
To generate a token, use the jwt.sign method. Pass an empty string for the data and pass in a secret key that is saved somewhere on your server. This key can be as complicated as a PEM encoded private key, or as simple as a long string that you create yourself. Store the key in your env file.
const token = jwt.sign({

data: ''

}, env.JWT_SECRET, { expiresIn: '10m' }

);
Set an expiration for your JWT. Unexpired tokens are dangerous if they leak into the wild (check the “Security Concerns” section for more on this.)
Sending Verification Emails
Next, we need to attach the token to an outgoing email. In the authenticationHandler file, create a method for sending the verification email. This method will handle generating the JWT, attaching it to an outgoing email, and sending the outgoing email with nodemailer.
const nodemailer = require('nodemailer');

const jwt = require('jsonwebtoken');


const emailSender = nodemailer.createTransport({

service: 'gmail',

auth: {

user: env.EMAIL_USERNAME,

pass: env.EMAIL_PASSWORD

}

});


const token = jwt.sign({

data: ''

}, env.JWT_SECRET, { expiresIn: '10m' }

);


const mailOptions = {

from: env.SENDER_EMAIL_ADDRESS,

to: userEmail,

subject: 'Verify Your Email Address',

text: `Hello! You recently signed up for an account with our website. Please follow the link below to verify your email

env.WEBSITE_URL/verify/${token}`

};


emailSender.sendMail(mailOptions, function(error, info){

if (error) throw Error(error);

console.log('Email Sent');

console.log(info);

});
You can test that this code works by running the file in your terminal using the Node command and passing the file name.
$ node authenticationHandler.jsHandling Responses
Once you’ve sent the message to the user’s email, you’ll need a way to handle the response once the user clicks the ‘verify email’ link. That link looks like this:
env.WEBSITE_URL/verify/${token}where env.WEBSITE_URL is the URL of your app or site (in development, this will be an http://localhost address.)
We’ll create a basic network request router in app.js with a single route to handle the request when the user navigates to this link. This route should receive a GET request, pull the JWT token off the request, and validate that the secret in the token matches the one stored on our server.
const express = require('express');

const jwt = require('jsonwebtoken');


const app = express();

const PORT = 3000;


app.get('/verify/:token', (req, res)=>{

	const {token} = req.params;

	jwt.verify(token, env.JWT_SECRET, function(err, decoded) {

		if (err) {

			console.log(err);

			res.send("Email verification failed.");

		}

		else {

			res.send("Email verified.");

		}

	});

});


app.listen(PORT, (error) =>{

	if(!error)

		console.log("Server is listening on port "+ PORT)

	else

		console.log("Error. Can't start server.", error);

	}

);
You can test this part of the code by clicking the verification link in the test email you sent from nodemailer in the previous step. If your env file is correctly configured and your app is running, the link should send you to a new browser window at your localhost address with the token in the URL.
Check your terminal for the app’s output to make sure everything is functioning smoothly.
Integrating with Email Service Providers
In this example, we used our personal Gmail account to test the process. In a production app, however, you would use a business account or professional account, either from Gmail or some other email service provider.

Popular Email Service Providers
Some other popular options for email service providers include Outlook, ProtonMail, and ZohoMail. Check the documentation for these services to learn how to configure an email address for use in email verification. It’s possible you may need an API key or other method of authentication in order to use the service in that way.
Setting Up SMTP with Node.js
If you’d rather handle all your own email yourself, you can set up an SMTP server with Node, but we don’t recommend doing this. Running your own SMTP server, even with a service like Sendgrid or Mailgun is time-consuming and error-prone. There are so many excellent email service providers out there that can handle this step for you that reinventing the wheel is unnecessary.

Security Considerations
Protecting your user data and your own server from malicious attacks is paramount to a successful application and a happy customer base.
Protecting Verification Tokens
JWTs are a very secure method of transferring security claims. That being said, there are some best practices you should engage in to ensure that security.
- Don’t put any sensitive user data (like email addresses) in the token
- Don’t put any information about your server or API in the token
- Always sign or encrypt your JWT
- Check the algorithm that was used to sign the token when you decode it
- Always validate an incoming token
- Always check the issuer of the token
For a deeper dive into best practices, read this article.
Handling Expired Tokens
Your JWT tokens should always have an expiration time. Unexpired tokens are dangerous if the token is stolen. Some apps use JWTs to log users in, and often they want to be able to log those users in indefinitely. In this case, some special considerations for handling expired tokens come into play.

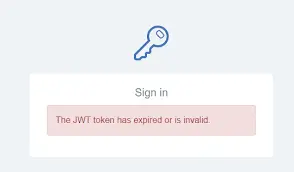
In our case, however, we are only using the JWT to verify an email address. All you need to do is alert the user that the token will expire after a certain amount of time, and include a way for the user to generate a new token in the verification email if the initial token has expired by the time they get to it.
Ensuring Data Privacy
As with any part of your application, ensuring the privacy of your users’ data is incredibly important. Make sure any sensitive and personally-identifying information is not stored on the frontend, and use a config or env file to manage your app’s secrets. Make sure this secrets file is never committed to an online repository like Github.
Troubleshooting Common Issues
Let’s take a look at the things that can commonly go wrong with this setup.
Failed Email Deliveries
If your test email fails to deliver, check your nodemailer configuration and make sure the email addresses of both sender and receiver are correct in your env file and any incoming variables. You should have a way to surface errors to the user if delivery fails.
Handling Bounced Emails
If your verification email to the user bounces, you may want to handle it by resending the email. Check the error response code that you receive when the delivery fails to determine what type of bounce occurred.
There are many different email bounce error codes for both hard and soft bounces. You’ll need to decide if you want to handle each one, and how to handle it. A complete list of email bounce codes can be found here.
Set a limit on the number of times you attempt to resend, and only resend if the error bounce code indicates that it makes sense to do so.

Resolving Token Mismatches
A mismatched token may indicate that the transaction between you and the client has been compromised. A mismatch occurs when the secret that gets decoded from the incoming JWT does not match the secret on the server.
Occasionally, a token mismatch may occur because the secret was passed in an unexpected way. Make sure you have only one instance of your JWT secret stored, and that it is stored in a secure, unshared file. Validate that the way you are decoding the JWT uses the same algorithm as the encoding process.
As with email bounce error codes, there are many error codes for failed JWT authentication. Check the docs to understand what each failure means.

Conclusion
Node.js is an excellent environment for programming web server needs. It is quick and simple to get up and running, and there are many third-party libraries available for development. With JSON Web Tokens and Nodemailer, implementing an email verification system is relatively painless.
FAQs
Why is Node.js preferred for email verification?
Node.js is a popular and easy-to-use programming environment that handles web server traffic efficiently. This makes it a good choice for building website backends and web apps. Its ubiquity in this capacity makes it a top choice for handling email verification, as there are many packages and libraries available to implement this process.
How can I ensure the security of my verification process?
Always adhere to best practices when handling sensitive data. Store all server secrets in a config or environment file, and do not commit this file to any online repositories. Never include sensitive user data or data about your API in a security token. Always validate incoming tokens.
Can I integrate Node.js with any email service provider?
Yes. Node is language and platform-agnostic, and many packages exist to make the process of integrating with various platforms and services easier.
What are the alternatives to Node.js for email verification?
If your website or app doesn’t have a backend, you could consider an API for email verification. An Email Verification API such as MailGun, Sendgrid, AbstractAPI, or WHOIS can receive a request with an email for validation and return a response with that email validated.
Many of these platforms can also handle sending verification emails for you. If you use an email campaign service like Mailerlite or Mailchimp, they will most likely send a “double opt-in” email to any users who attempt to sign up to your list.
How do I handle users who don’t receive the verification email?
Examine any incoming error codes that your app receives from failed deliveries. Based on the status of the error, you may try resending the email, or surface an error message to the user at the moment they input their email address.
Experienced software engineers and avid supporters of the developer community, specializing in APIs.


